Showing posts with label filmmaking. Show all posts

Tuesday, July 9, 2019

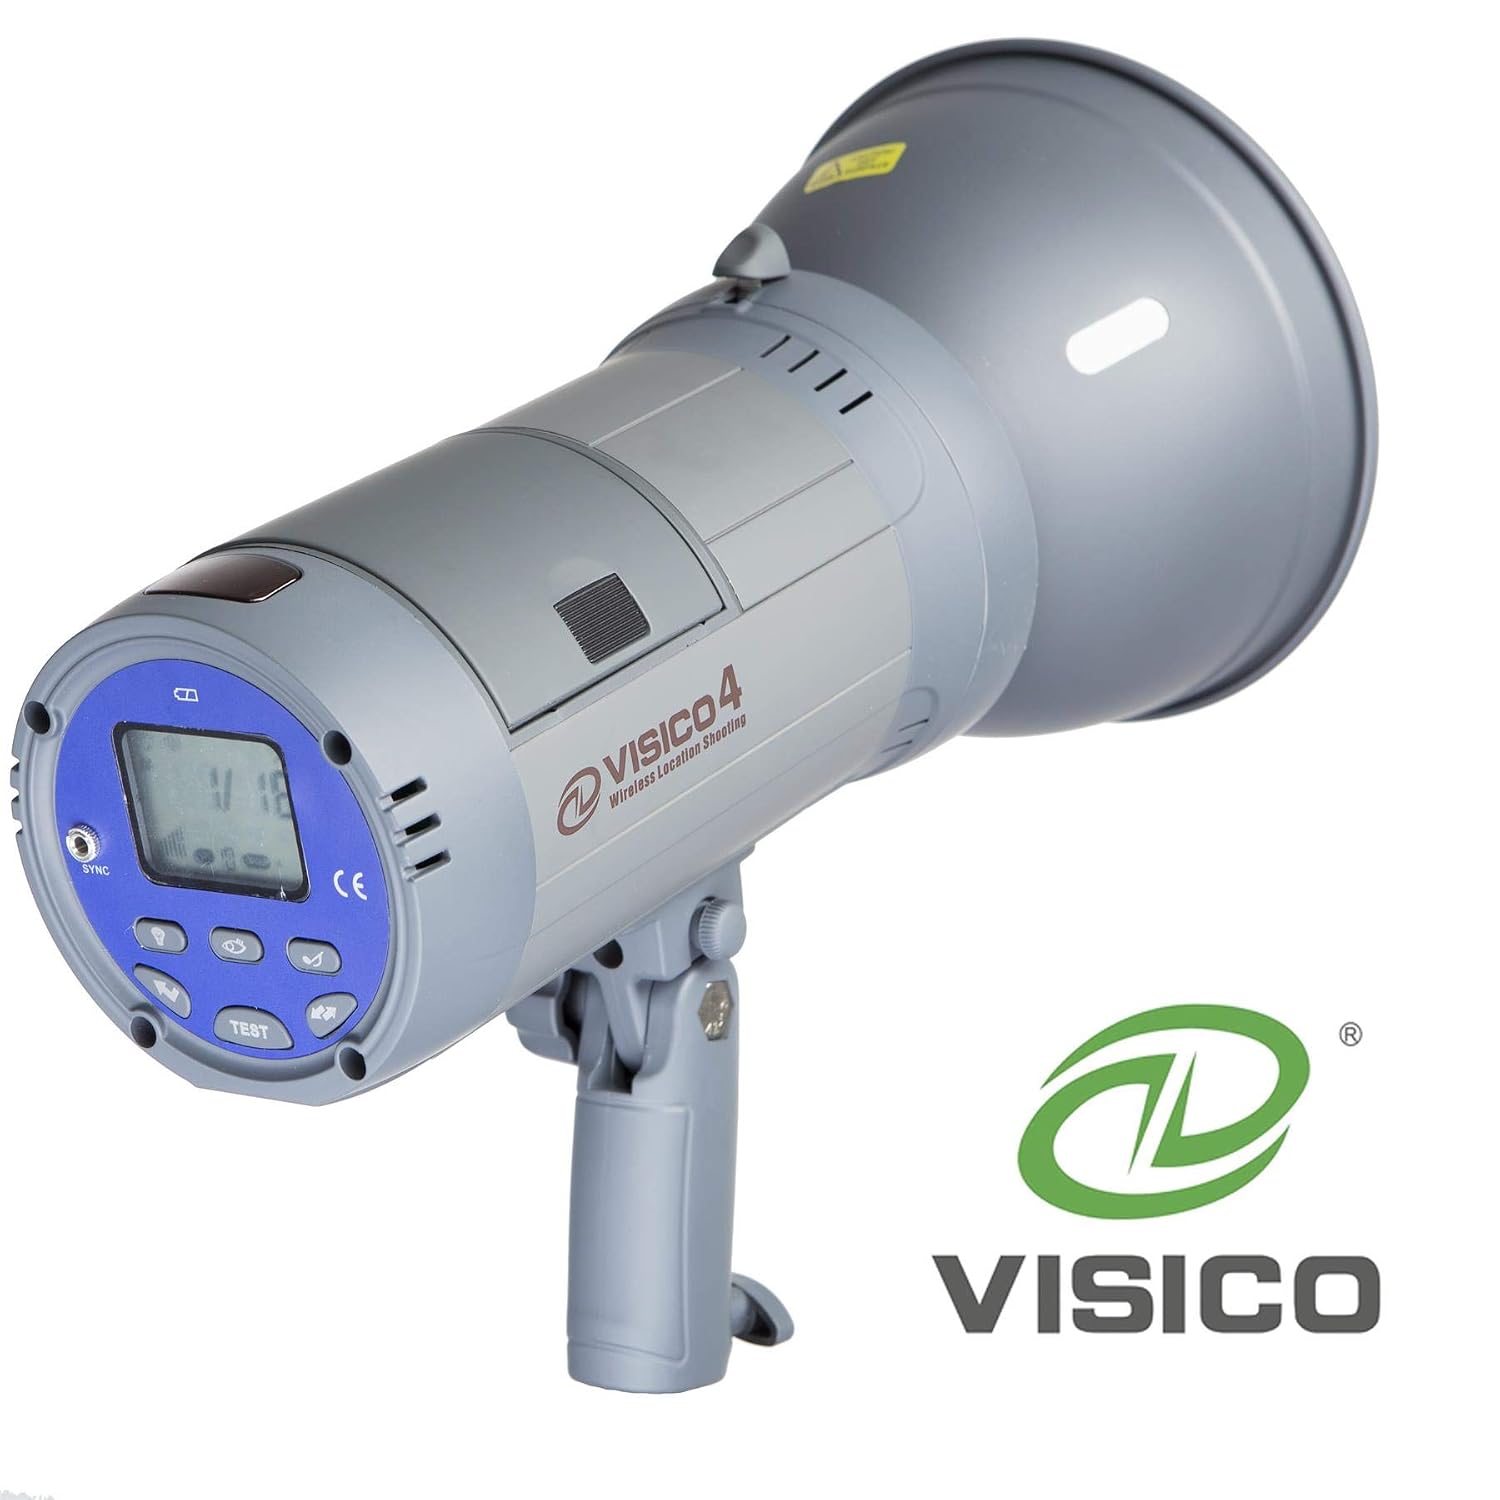
Neewer Vision4 and Visico 4 - SAME FLASH

It's incredible to me how difficult it has been to find a user's manual for the Neewer Vision4 flash.  I finally found some information that clued me in to the fact that Neewer's Vision4 is a rebranded Visico 4, and I could find a manual for the Visico.


https://images-na.ssl-images-amazon.com/images/I/71siVo32X-L._SL1500_.jpghttps://i.ebayimg.com/images/g/69EAAOSwmoVan5ui/s-l1600.jpg

So this post is just to let people know: if you're searching for a Neewer Vision4 manual, search instead for Visico 4 (which is much easier to find).
...

Wednesday, June 10, 2015

Red Giant MisFire Setting Definitions

The problem with MisFire is that I have NO IDEA what the different settings of each thing do.  I end up having to look stuff up every time, and when I do, I usually end up at this page, so I’m reposting here (basically so it’s easier for me to find!).

Major props to whomever posted this information online at:

http://www.aemoban.com/Source_Files/AE-misfire.html

I can’t figure out what the aemoban site is (the top tier is in Chinese), so I’m reposting the information here (because who knows when that page will disappear).  No copyright infringement intended.  Just making the information available to the filmmaking community!

=====================

MisFire Plug-ins

MisFire adds a host of tools to your effects arsenal to simulate film damage. The main MisFire plug-in is a single complete tool that offers 13 different effects. Each category of effect can be turned off individually using the category switch. The effects are: Fading, Funk, Splotches, Dust, Flicker, Vignette, Displacement, Grain; and 3 different types of scratches, Microscratches, Basic Scratches and Deep Scratches.

The main MisFire plug-in is accompanied by individual plug-ins for each effect category. For example, if you only want to apply grain and basic scratches, you can apply these as individual effects called Misfire Grain and Misfire Basic Scratches.

MisFire plug-ins are not a perfect duplication of every type of film defect. Film defects are wide ranging in their appearance and include problems caused by dust, dirt, film wear, duplication problems, splicing, irregular exposure or improper storage of the film medium. These defects can show up in the frame or be caused by improper projection. MisFire attempts to artistically emulate a number of these defects.

clip_image001


MisFire Fading

Fading causes an overall lightening of your image that is exhibited as lower contrast.

Fade Amount: The default value is 100, lower values will lessen the effect.

clip_image002

clip_image003


MisFire Funk

Funk provides for tone variation across the frame. This simulates a film negative with lightness variation across the entire frame that may be caused by improper storage or in an environment where fungus or mildew could form. This is similar to the splotches but occurs throughout the frame and will persist from frame to frame.

Funk Opacity: The default is 15%. High values may look unnatural but feel free to adjust to taste.

clip_image004

clip_image005


MisFire Splotches

Splotches manifest as a local dirtiness or discoloration of the frame. This can happen on any frame and will usually only persist for a frame or two at a time.

Number: Controls the number of splotches on any given frame where the scale controls the size. The Scale value at 1.0 will cover about 40% of a standard DV-size frame or about 16% of a 2K film frame.

Transparency: Controls the darkness of the discolored areas. You may need to lower the value on very bright footage (to make the splotch less prominent) or raise the value for very dark footage to bring out the effect.

Frequency: Determines how often a splotch will appear in a sequence. The default value of 50 will cause a splotch to appear on half of the frames. Try lowering this value if you want the splotches to occur less frequently.

clip_image006

clip_image007


MisFire Dust

Dust essentially draws bits of black and white material onto the frame. This is effect is similar to the small particles that appear on film that has been run through a projector numerous times. The defaults are meant to generate a small amount of both black and white dust that is very noticeable.

NOTE: While a number of categories include a Frequency control, each category determines its frequency separately, so splotches won’t necessarily appear at the same frame as dust or any other category of effect.

Black Dust Amount, White Dust Amount: Control the maximum number of black or white dust particles appearing in any one frame. For large frame sizes, you may want to make this value much larger to increase the appearance of the dust.

Opacity: Specifies the transparency of the dust particles. The default is 100%, which makes the particles quite noticeable. If you want the dust to look smaller in the frame, try lowering this value to between 40 and 60%.

Frequency: Determines how often a dust particle will appear in a sequence. The default value of 50 will cause dust particles to appear on half of the frames. Try lowering this value if you want the dust to occur less frequently.


clip_image008

clip_image009


MisFire Flicker

Flicker causes the image brightness to change from frame to frame. This is similar to the uneven brightness caused by the degradation of an old print.

Frequency: Operates the same as in the Dust or Splotches categories, where the value specifies the percentage of frames in a sequence that will have change. The default value of 50 means that half of the frames in a sequence will change in brightness.

Flicker Amount: Controls the degree of brightness change. The default of 10 will cause only a small variation.

clip_image010

clip_image011


MisFire Vignette

Old film tends to exhibit a lot of darkening around the edge of the frames, which is often a result of the lens and camera that were used to shoot the film. Vignette will mimic this aberration. Unlike other MisFire effects, Vignette does not animate or change from frame to frame.

NOTE: Magic Bullet Looks includes an integrated Vignette tool that you can use as a replacement for MisFire Vignette. The two produce similar results but Looks' Vignette can be integrated into a Look rather than applied separately.

Size: Controls the overall width of the darkening where a value of 0 will darken all the way to the center and value of 100 will not darken the frame at all.

Intensity: Simply changes the amount of darkening.

clip_image012

clip_image013


MisFire Displacement

Often old or mishandled film prints can exhibit a warping of the image caused by a physical bend in the film frame itself. Displacement offers a very simple control for warping the image.

Amount: Specifies the level of warping in the image. With this control, a little goes a long way. This category of effect does not auto-animate so you may want to keyframe the Amount value.

clip_image014

clip_image015


MisFire MicroScratches

MisFire offers 3 different styles of scratches. MicroScratches are very thin, faint black lines across the entire image. Film is often scraped as it run through a projector, creating faint black lines on the frame, and this damage is what is replicated.

Number: Does not correspond to the number of scratches, but instead is a measure of the density of the scratches—higher numbers yield a denser field of black lines.

Opacity: Changes the transparency of the lines. The Number and Opacity controls should be adjusted in tandem. If you raise the Number control, you may want to lower the Opacity, or vice versa.

clip_image016

clip_image017


MisFire Basic Scratches

Basic Scratches generates thin bright or dark lines that wiggle or move from frame to frame. Unlike the MicroScratches or Deep Scratches effect, Basic Scratches will not cover the entire frame but will gently fade toward the top or bottom of the frame.

Number of Scratches: The specified number of scratches that will be drawn on the image.

Maximum Duration: Controls the maximum length that any one scratch will appear on the image. The duration is determined randomly for each scratch and can be between 1 frame and the maximum specified number of frames.

Invert: Lets you specify either dark lines (when it is on) or light lines when it is off.

clip_image018

clip_image019


MisFire Deep Scratches

Deep Scratches generates a colored scratch that appears to have depth, and to wiggle or move from frame to frame. This colored scratch mimics a physical scratch on the film that has removed some of the film resist, letting light through that is pure in color. The scratches can shift left or right by a random amount that varies from 0 to 5-7 pixels, depending on the size of your image.

Number of Scratches: The specified number of scratches that will be drawn on the image.

Maximum Duration: Controls the maximum length that any one scratch will appear on the image. The duration is determined randomly for each scratch and can be between 1 frame and the maximum specified number of frames.

Tint Color: Specifies the color of the scratches. The default color is close to pure green, which is the color of real scratched film.

clip_image020

clip_image021


MisFire Grain

When most people think of film, they think of grain. While some film stocks do exhibit noticeable grain, this type of effect is best used sparingly. The Grain category generates more than just random noise. If all you want is random noise, a simply noise filter applied on top would work fine. The Grain controls go beyond this by letting you create the multi-colored clumps associated with true film grain. Grain offers ten different controls for specifying the amount of grain and where it appears on your image.

NOTE: Magic Bullet Looks includes an integrated Film Grain tool that you can use as a replacement for MisFire Grain. The two produce similar results but Looks' Film Grain can be integrated into a Look rather than applied separately and its speed is generally 3-4 times faster.

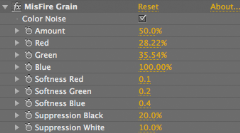
Color Noise: Lets you simply specify whether the grain is the same on all the color channels Red, Green and Blue. This control is on by default. If you turn it off, you will notice that the colored grain disappears and is replaced by a tinted noise, based on the Red, Green and Blue percentages.

Amount: Gives you control over the density.

Red, Green, Blue: These three controls specify how much grain appears and how soft it is. The Red, Green, and Blue controls are specified as a percentage and these bias the Amount setting. For example, the Red control defaults to 28.22%. This means that only 28.22% of the Amount value is used in the Red channel of your image. If these values are all the same, then the grain will have the same amount applied to each channel. They are interrelated and related to the Softness controls.

Softness Red, Softness Green, Softness Blue: These three controls let you soften the grain on each color channel. Smaller values mean harder edges, larger values add a more diffuse look. It is best to stick with small values in these controls. They are interrelated and related to the Color controls.

Suppression Black, Suppression White: These two controls determine whether the grain is drawn in purely white or black areas . The percentages specify the percentage of brightness or darkness in the frame where the grain will NOT appear. For example, 10% Suppression White means that the grain will not draw in the very brightest pixels in the image and will only appear fully in areas that are 10% or less of fully white pixels.
clip_image022

clip_image023


MisFire Gate Weave

When a film frame passes through a projector, sprockets outside the image area control the vertical motion of the frames through the projector. Over time, a film can be become warped or the sprockets can wear, causing the frame to appear to move side to side. This kind of motion is called Gate Weave and this effect mimics it.

Weave Frequency: Controls the speed of the left-right motion of the frame. Small values cause the frame to move slowly. High values will cause the frame to move quickly from side to side.

Amplitude: Measured in pixels. The default of 5 pixels will cause the frame to move left or right 5 pixels then return to center.

Noise Frequency: Varies the motion by the percentage you choose. Small values will cause a slight variation of the motion, while large values will cause the frame to appear to jitter.

clip_image024

clip_image025


MisFire Post Contrast

Film often appears with higher contrast than video. Over time the darkening or contrast change can be quite pronounced. The Post Contrast control lets you quickly add this effect.

Contrast: Applies a darkened high contrast effect. The default value is fine in most cases. Values beyond 50 will likely look unrealistic. Negative values can cause the image to appear to wash out.

clip_image026

clip_image027


Saturday, May 9, 2015

Transfering Data in the Field with Android (Media Card to Hard Drive)

I wasted pretty much a whole day figuring out how to transfer data from a CF card to a USB stick and/or hard drive using only Android.  I say “wasted” because I was trying all these things that in the end I found out I *DIDN’T NEED TO MESS WITH!*

All the research I had been doing regarding “dumping cards in the field using Android” (simply transferring data from a CF or SD card to a hard drive for back up and card reuse) led me to believe this was a very involved process requiring special cables, apps, altering the functionality of your device, etc., etc.

Almost none of that is true, or at least, it’s not ANYWHERE near as big a deal as people would have you to believe.

Lunitek Y-3123ong story short, if you plug a powered hub with a CF reader and USB ports (I’m using the Unitek USB3.0+Card Reader :: Y-3123) into your device via an OTG cable, it will probably work right off the bat (wish I’d have just tried that first!).

So why did this take me all day?

I thought I was being all clever rooting a Galaxy S5, installing CyanogenMod 12.1, and then downloading various apps that in combination would allow the transfer happen.  I thought I needed [root]StickMount. I even purchased the Pro version.  But at this point, I really have no idea what StickMount is even for.  Your device will likely read a USB stick as is.  There is no need for this app (or rooting your device for that matter).

In the end, the stock Samsung TouchWiz Lollipop OS worked great.  The stock OS on my LG Gpad (Kit Kat) also worked great.  In fact, with the Lollipop on the S5 (from Verizon), there is a really nice little area in “My Files” that allows me to easily pick between USB Storage A (the CF card) and USB Storage B (a USB drive)… though “My Files” doesn’t allow me to see my 750GB NTFS drive (see below for that bonus action).

This set up also works like a champ with my stock LG Gpad 8.3 (Verizon Kit Kat).

This means BOTH my devices, as stock (Lollipop and/or Kit Kat), are able to transfer data from a card to a thumb drive (either FAT32 or exFAT) via a hub (you may need a powered hub, depending on how much power your device puts out and how much power your card and USB stick require).

Here’s the bonus: if I use the Paragon Technologies GmbH plugin for Total Commander, my Galaxy S5 and LG Gpad 8.3 WILL allow me to read/write to/from the 750GB NTFS drive and it doesn’t even require root access to the device (very cool)!  I have found that I actually need to install two plug-ins for Total Commander to make an NTFS hard drive, a card, and a USB stick all work together.  You need USB Stick Plugin-TC by Ferenc Hechler to use both NTFS and FAT32/exFAT.  For some reason, if you install the NTFS plug-in, Total Commander treats everything plugged into the hub as NTFS, thus non-NTFS drives (CF card and USB drive) are not recognized.  Installing the Stick Plug-in restores Total Commander’s ability to see the card and USB stick with the NTFS drive.

If your device is rooted, there is actually a patch that someone on the XDA Developers forums has come up with that will allow Android to read/write NTFS, but the installation is a little more involved (dropping files and modules into particular directories on your device), so going the Total Commander route is just a little easier in my opinion.

All said and done, the actual data transfer takes a while, but by transferring directly from card to hard drive (or USB stick) you eliminate the extra step that a lot of people are going through when they transfer from a CF reader to their device’s SD Card and then back out to a Portable Hard Drive (though if your device’s SD card is big enough, leaving a copy of the files on the SD card offers additional back up).

On my LG Gpad 8.3 tablet I dumped 9GB from a 16GB SanDisk Extreme (160MB/s) CF card containing RAW files and .MOV files (from a Canon 7D) to a USB 3.0 (not that it matters –the connection is USB 2, thus that’s the speed limit) 16GB Transcend USB stick in roughly 23 minutes (not awesome, but probably fast enough to transfer while you’re shooting another couple of cards).  Later that day, I transferred a full 16GB CF card (600x Transcend) to a 5400RPM 2.5” portable HD formatted exFAT, and it actually took less than 23 minutes.

To reiterate: I am confirming that with both the Samsung Galaxy S5 and the LG Gpad 8.3 I can use a powered hub to plug in a 16 GB CF card (FAT32), a 32GB USB drive (exFat), and a 750GB external NTFS hard drive… all at the same time… and transfer data between all three devices (not to mention the device they are all plugged into).

Furthermore (and obviously the easiest way to go), if you format an external hard drive using exFAT or FAT32, your Android device will almost certainly allow you to dump data from a media card to the hard drive without making ANY modifications and by simply using the stock file explorer on your device!

I will also state (though I have no good reason for this), the transfer seems to work most consistently, without glitches, without having to try several times, on Kit Kat (with my Gpad).

microUSB-charger
usb-atype-f-a

While we’re on the topic, let’s explore this magical “OTG cable.”  It’s a cable that has a male micro USB B to go into your device, and the other end has a female type A USB.  That’s it.  The only thing special about this “OTG” cable is that pins 4 and 5 are jumpered.  In fact, as shown in this Makezine article, if you’ve got a micro USB cable and a USB 2.0 cable lying around, you can splice them together to make your own OTG, just be sure to jumper pins 4 and 5 (because: “When the sense pin is connected to ground, the USB OTG device attached to the cable enters host mode. If the sense pin is left in its usual disconnected state, the USB OTG device will remain in slave mode”).

Monday, February 2, 2015

Cheap LED Kino Type Lighting

As a filmmaker builds his/her kit, one usually starts with whatever is available (cheap) and then moves up to “real” equipment over time.  As such, I have a lighting kit that consists largely of things cobbled together from what I could buy at Lowe’s and Harbor Freight and on eBay and Craigslist.

500wHalogenHalogen work lights are the easiest way to get a lot of light, but they consume a lot of energy (500 watts per light for the regular sized ones and 250 or 150 watts per light for the smaller ones), so you’re really drawing a lot of electricity from each circuit at your location.  You’ll also be white balancing for tungsten, which I often actually prefer (shooting warm) because it’s easier to incorporate practicals (lights already present on “set”).  The higher wattage of halogen work lights also means you’ll need more dimmers, or more expensive dimmers that can handle higher wattage.  The highest “cheap” dimmer from the local home store goes for around $10 and handles 600 watts (so only one big light).  HFrouterspeedcontrollerYou can use a router speed control unit from Harbor Freight ($25 but often on sale for $20) as a higher wattage light dimmer (15 amp x 120v so just shy of 2k at around 1,800 watts), but the output control isn’t as precise as an actual lighting dimmer.

I have started using more Chinese manufactured four socket CFL bulb lights with soft boxes.  While they are cheap, cast a nice, soft light, and consume far less energy, they take a while to warm up for full light output.  Not only that, but when shooting at high shutter speeds (like 240fps) you run the risk of getting a lot of flicker.  Also, with fluorescents, dimming is best with just on/off (number of bulbs on), because dimmable CFL’s are quite expensive… and they cause even more flicker when dimmed.

Recently I ran across “LED Shop Lights” from Feit on sale at Costco.  They are basically a four foot shop light replacement intended for garages and work shops.  As LED, there is “no flicker” (like a cold fluorescent) and no warm up delay, period.  They are normally $39, but on sale they are $33.  The same light goes for around $60 on Amazon, so this is nearly HALF the cost (and I don’t see anything else listed that’s even close).  Even at full price ($39) they seem like a decent deal.

Each “bulb” has 60 LEDs, so each light has 120 LED’s and are rated at 3700 lumens and 4100K temperature (“cool white,” though not daylight, which is 5600K).

Direct comparisons to other kinds of lights are kind of difficult.  It seems like LED light drops off a lot faster than incandescent and fluorescent (the light gets dimmer more quickly the farther you get from the source).  Thus, when a light is rated 3700 lumens, I think it depends a LOT on how far from the light you are taking the measurement (and less so with halogens, for instance).  So even though the packing says these lights put our 3700 lumens, you have to keep the lights MUCH closer to your subject than you would with fluorescent or halogen/incandescent.

I’m also having a hard time putting together a cost comparison of these lights and the strip-on-a-roll kits you can purchase from eBay and Amazon.  With those, you would have to figure out how to mount and diffuse, which is not hard, but ads to the cost.  You also have to purchase plugs/converters, etc., whereas this shop light just plugs into the wall.  The strip-on-a-roll would seem to be cheaper at first glance, but I have a feeling that once all is said and done, this shop light is a pretty close price point when purchased for $33.

The housing for the shop light is metal with plastic over the electronics.  The LEDs are actually mounted to a metal strip, not a flexible plastic strip, and that metal strip slides extremely securely into the plastic diffuser tube, which is opaque on the back half and translucent on the front.

Most LED strip kits I’ve seen require giant transformers (like you’d use with a laptop), so the fact that this shoplight has very small electrical components (easily hidden) is great.  You could definitely reduce the size of the ends (where the electronics are housed) if you wanted to.

20150202_13225720150202_13230720150202_13231720150202_13233020150202_132356_120150202_13241020150202_13241920150202_132432_120150202_13245520150202_132513

I tried hooking these up to my incandescent dimmers (which work fine with my LED PAR38 bulbs) and the LED’s in these shop lights definitely freaked out; I’m not sure how they’d work with LED specific dimmers (hopefully I’ll get a chance to test that soon).

Tuesday, January 27, 2015

Windows Doesn’t Always Load ICC Color Profile for Monitor

I recently installed a new EVGA GeForce 750Ti video card in an older machine.  I had some points on a credit card that would make a card in the sub $200 range “free,” so I did some research on video cards and upgraded my rather ancient GTX 260 (which I actually used while cutting our feature film in 2009!) to decrease my rendering times and allow for a bit more oomph when utilizing CUDA processing for effects and on-the-fly rendering in Adobe Premiere.

The GeForce 750Ti is basically the “sweet spot” for cost/power in gaming cards, which are the poor man’s video-editing cards (though, as of this posting, NVIDIA has released the GTX 960, which is the new sweet spot in this category).  I would have loved to install a higher-end “Adobe Approved” Quadro card(s), but this option is cost is prohibitive at the moment (we’re putting money into camera equipment), so this is a decent band-aid for this particular editing rig.

We use Xrite EyeOnes (i1) with EyeOne Match 3 (v.3.6.2) software to calibrate our monitors.  However, after installing the card, I kept getting the dreaded “pink screen” hue almost every time I’d reboot the machine after calibration.  The most common cause for this malady is a bad video cable (I’m using a super-thick (24AWG) and fairly long 15 foot DVI Cable, so this was definitely a possibility).  However, I checked my cables (using DVI, HDMI, and even Display Port), and the cable was not the issue.

I also checked my system defaults to be sure Windows was calling up the custom i1 color profile as the profile for the monitor.  The profile was marked as the default and appeared to be the active profile in the color settings, so I assumed it was being used.

I couldn’t figure out what was going on, so I thought maybe it was the card.  I RMA’d the card, and Amazon sent a new one.  p.s. I really appreciate their policy of sending a replacement before they require you to send the defective unit back.  They give you a month to return the item once they send out the new one, so I didn’t have to go without a video card while waiting for the replacement (yes, I could have put the old one back in, but I was enjoying the decreased rendering times too much).

The new card arrived. I installed it and ran color calibration on the monitor.  For a couple of days, everything seemed great, until one day… the dreaded pink screen had returned.  I spent three more days researching the issue before I finally came across the solution.

It turns out there are not one, but TWO places where Windows 7 64-bit has settings for loading the monitor’s ICC color profile.

Yes, you can set your monitor’s ICC color profile at Control Panel>Appearance and Personlization: Adjust screen resolution>Advanced settings>Color Management (tab)>Color Management (button), but there is another place you need to do some tweaking in order to tell Win7 to actually USE these settings.  How stupid is that?!

So on the Advanced tab where you can select your defaults, there is a button at the bottom called “Change system defaults…”

Advanced Color Profile

In that panel, there is an “Advanced” tab, and at the bottom right of that panel there is a box called “Use Windows display calibration.” You must tick that box to get Windows to actually use your ICC monitor calibration setting each time it starts (even though it would appear, from the previous panel, that Windows IS using the default).  Unbelievable.  Why even have the option to set a default if the system isn’t going to USE that default without this “secret setting?!”  It’s not really a default if you aren’t using it, is it. Grrrrrr.

Color Management Advanced Defaults

Many thanks to user “badspell68” for posting the solution to this problem in this thread:

http://www.sevenforums.com/general-discussion/162431-color-profiles-calibration.html

p.s.  I think it’s worth nothing that the “pink hue” we experience when the EyeOne custom ICC profile isn’t properly being utilized is a result of the physical monitor settings.  I usually just calibrate the monitors using the “easy” setting in the EyeOne software, but at one point I actually went through the “advanced” setup which involves calibrating your calibration device to the ambient light in the room (our room is currently fairly warm on the color spectrum) as well as adjusting the physical settings on the monitor (not just changing the settings using software).  When I did this, EyeOne had me set the red hue of the monitor higher than it had previously been (higher than what looks good to the eye), thus when the custom color profile is not being utilized (when the monitor is displaying “as physically set”), the screen has a pink (red) hue in the white areas.

Saturday, January 10, 2015

7D WiFi with TP-Link and DSLR Controller

[1-14-15: see update at end of post]

I put my 7D on a 12 foot jib arm quite often.  I use a 25ft. HDMI cable to run video signal to my 7” Lilliput monitor.  This means I can see what I’m doing, but there’s no pulling focus or starting/stopping the camera.  Thus, I set focus (pull the camera down, adjust focus, push it up, check, try again, repeat) and when I finally achieve focus lock, I start the camera, then put the camera up in the air and let it run.  “Burning Film” isn’t that big a deal in this age of ultra-cheap storage, but leaving the camera running kills battery and and the focus thing is a major PItA.

Thus, when I saw DSLRController (a remote control for your DSLR via USB and your tablet or smart phone), I got very excited about the possibility of starting/stopping the camera remotely via a long USB cable.

To be sure, DSLR Controller does SO. MUCH. MORE.

But this post is about adding WiFi capability to your 7D… so you can use DSLR Controller WIRELESSLY.

51RoV2I0wnL._SL1280_I ordered my TP-Link TL-MR3040 portable wireless router on Amazon ($40), and received it in the mail a couple days ago.  I flashed the firmware on the router according to the easy to follow instructions on the DSLRController webpage, and in about 15 minutes I was up and running.

I am astounded by how well this set up works.  Not only that, but you can run HDMI out (monitor) and USB out (DSLR Controller) at THE SAME TIME.

Yes, I am confirming that you can monitor video via USB and HDMI at the same time.

Thus, I can run an HDMI cable to video village, while still having a 7” field monitor (my LG GPad 8.3) with touch screen controls for shutter, focus (yes, focus… even focus “a” to “b” with the push of a button), histograms, etc… In fact, most of the “everyday” controls of the camera can be accessed via my tablet touch screen.  Again… wirelessly.

Freaking fantastic.

TP-LinkMount

I also glued a 1/4” nut from a hot shoe mount to the TP-Link with PC-7 epoxy so I can easily mount the TP-Link to the hot shoe mount on my 7D.

The battery in the TP-Link will likely last as long as I’ll ever be shooting on the jib, but to be safe, I also ordered an Anker® 2nd Gen Astro E5 16000mAh Portable Charger External Battery Power Bank and received the smaller Anker® Astro E1 5200mAh Ultra Compact Portable Charger for free (total cost for both, $40).  Thus, I now have plenty of power for my tablet and the wifi router when I’m in the field.

 51LQlocF15L._SL1000_51puhByakeL._SL1000_

[UPDATE 1-14-15]  After using this set up for an 8 hour shoot last weekend, I would have to modify my glowing endorsement and qualify this as “not yet ready for prime time.”  I’m not where exactly the fault lies (the router, the tablet, the app), but often the link between camera and app would be lost, or (more often) the app would simply lock up and/or black out.  Since I was in charge of the shoot, it wasn’t the worst thing in the world to troubleshoot while working (especially since I expected some hiccups since I was using it “live” for the first time), but had I had a producer/director/cinematographer breathing down my neck while I was trying to figure out what the hell was going on, it would not have been a fun situation.

I had the 7D mounted to a 12 foot Kessler Crane.  I can’t imagine that the range was the problem (when it was working, it was working great).  It really seemed like either the tablet (LG Gpad 8.3) or the app was what was choking each time it crapped out.

Word to the wise: this set up is FANTASTIC when it’s working… but it doesn’t always work.

FWIW, my second camera said he had experienced similar problems with a GoPro and the GoPro wifi app… when it worked (during his tests at home) it was awesome, but when it fails on set and the production is burning more than $90/minute for cast and crew… no good.