Tuesday, August 5, 2025

Jeep Liberty KJ (and other Jeep) Skid Plate Frame Rivnuts

I purchased a (third! 😆) 2006 Jeep Liberty KJ CRD that must have started life as a base model, because it only has the forward-most skid plates.  It's missing the skids for the transmission pan, the transfer case, and the gas tank.  Luckily I have a donor CRD that I could pull the missing skid plates from, but when I went to install them, I found that the frame rails where the skid plates attach do not have threaded holes for the M10 skid plate bolts.  There are simply hex shaped holes where the bolts should thread in.

What I found is that these locations need a M10 1.5 10.9 steel hexagonal rivnut (also called a rivet nut or nutsert).

I checked with my local Jeep Dealer parts dept. and they had none in stock when using a 2006 Jeep Liberty for the search (part #6506644AA).  They searched nationwide and were only able to locate two at a dealer in TX and one at a dealer in IL.  Those were literally the only factory rivnuts my dealer could locate for a 2006 Liberty.  

I should have just purchased from eBay, which is where I ended up purchasing them later.

When I widened my search for a Jeep M10 rivnut, I found another M10 nutsert for the 18-25 Jeep Wrangler JL & Gladiator JT (with no mention of the 2006 Jeep Liberty KJ CRD).

The Mopar part number for this M10 1.5 10.9 Steel frame rivet nut found in the search above is 06511076AA.  Various Mopar and Jeep dealer sites on line stated that this would absolutely NOT work for a 2006 Liberty.

When I called my local dealer back and used the parts number for the rivet nut for a 2025 Jeep Wrangler, they had plenty in stock at $8.20 each (pretty high price, but I decided to pay the premium for the 10.9 steel over the zinc coated "medium steel" non-factory versions I was able to locate online).

As you can see from the two photos, the rivnuts do look different.  What I found was that the Wrangler/Gladiator rivnut will work in SOME places.  I can verify that the rivnut that works with the Wrangler and Gladiator can be used for KJ frame rails, but NOT the cross member that runs under the back of the transmission pan (the cross member that holds the back of the oil/tranny plate as well as one side of the transfer case plate).  This beefier looking rivnut definitely fits in the hexagonal holes of the frame rails running down each side of the vehicle.  In a couple places it was a tight fit, but slid in when I wiggled it.

So I ended up using the Wrangler (slightly larger) rivnut for the two locations in the frame rail, and the Liberty (slightly smaller) rivnut in the cross-member locations. 

For the record, I could find mild steel zinc coated M10 rivnuts online, but I decided I wanted to use the original 10.9 steel rivnuts originally spec'd for our vehicles.


Monday, February 15, 2021

Switching Between Various Profiles for Multiple Monitor Configurations

I honestly cannot believe the dirth of solutions for the problem I was facing.

With everything moving to "stay at home" and mobile workplace scenarios, I recently started using a laptop again.  Obviously the reason to use a laptop is so you can work in multiple places, and, as such, utilize multiple configurations.

When I'm in my studio, I'm using four monitors.

When I'm on the road in my Airstream, I'm using the laptop monitor and a television for an extension monitor.

When I'm gaming in the studio, I enable only two ultrawide external monitors.

When I'm gaming in a mobile location, I use only the laptop monitor.

When I work or game in the house (by the fireplace!), I'm using just the 4k TV.

So what kind of solution does Windows 10 have for switching between all these scenarios?

NONE!!!

All I wanted was a way to save various profiles for these display configurations.  I can't believe there is no native solution.  Furthermore, NVIDIA doesn't seem to provide a solution either!  From what I could find, the only other programs that provide something like what I'm looking for are bloated with all kinds of other garbage (menus, background switchers, etc.).  I just want to switch between Windows display profiles.  That is all.

Luckily there are people like martinK84 in this world.  Martin created a program called Monitor Profile Switcher.  It's very light, and works very well.

I was a little nervous about installing a program from an unknown publisher, and as such, I can't really vouch for the security of such a program, but so far, so good.

I can also see a potential for someone creating a profile that prevents them from accessing the controls, because they've disabled any monitors currently in use, but Martin preemptively addresses that possible scenario with this paragraph:

What if anything goes wrong?
The worst possible case is that you somehow manage to disable all your monitors, although very unlikely theoretically it could happen. If everything goes black try to make sure that all devices which are attached to the computer are actually turned on and see if you see an image anywhere (even a monitor/tv without power counts as attached device). If nothing helps boot windows into safe mode to fix the problem.
The program is listed as "beta" and notes that it does not currently work with NVIDIA's Surround and AMD's Eyefinity Technologies.  Also, USB GPU's are not currently supported, but experimental support has already been implemented for Version 0.6.0., so it's on the way!

Thanks, martink84.  You rule.

...


Thursday, January 14, 2021

Prevent Paragraph Double Spacing When Responding to Forum Posts in Firefox

It's infuriating that the default setting for Firefox is to double space paragraphs when you are responding to posts in forums.  Here is the fix...

Type about:config in the address bar.  You will be shown a warning letting you know that you can really screw up your browser messing around with these settings.

Type editor.use in the search bar and you will see a setting for "editor.use_div_for_default_newlines"

Change the setting to false, and your responses in forums will no longer be double spaced.


...

Wednesday, September 30, 2020

Watching Media from USB on LG Smart Tv

 Since LG has done such an abysmal job of providing any meaningful information on the topic of watching videos from a thumb drive via an LG Smart TV... I guess I will do the work for them.


The USB drive evidently has to be formatted as Fat32 (exFat, even though the new "universal standard," will not work).

The TV can read most typical video formats, including to my surprise, MKV.

After searching and searching for any meaningful information on how to get things working (file formats, file structure, etc.), I finally just started poking around in the TV settings to see what I could find.  Eventually I found a way to format my USB drive with the television, so that at least showed me what format the TV preferred (Fat32).  Formatting via the TV named the USB drive "no name" and created a folder called "LG Smart TV."  In that folder is a subfolder named "TN," and inside that folder is a file called "INFO."

The INFO file contains this data:

{"INFO":"{ \"core_os_release\": \"3.8.0-61408\", \"returnValue\": true }{ \"device_name\": \"m2r\", \"returnValue\": true }"}
After formatting the USB drive with the television, I popped it back into my computer and loaded it with some videos I had created via Handbrake.  However, since the drive is now formatted as Fat32 with a 4GB file size limit, none of my MKV's ripped from my DVD/BluRay collection can be placed on the drive (those files are larger than 4GB).

There is some information on the LG website that indicates you can also use the NTFS format, which would allow larger file sizes, so I reformatted the USB drive to NTFS using my computer, and sure enough, NTFS works as well.  Therefore, I can now watch the larger MKV files via USB on the LG TV.  Huzzah!

...


Wednesday, September 16, 2020

ErgodoxEZ Split Ergonomic Keyboard for Video and Music


My Microsoft Sculpt was failing me.  I don't know if it was my incredible typing speed (ha!) or faulty hardware, but there were way too many "failed strokes" for me to keep using a wireless keyboard.  I love the Sculpt's layout, low profile, and portability, but it doesn't matter how good something feels if it doesn't work.

I started coding for design at the turn of the Millennium (so fun to say!), and quickly learned how bad a "regular" keyboard is for 10 hours or so of daily use.  Back then, there weren't a whole lot of "ergo keyboard" options; the MS Natural Keyboard was pretty much it.  But I found that my shoulder/wrist issues necessitated getting my mouse closer to the keyboard (my arm was sticking out to far to the side), so a keyboard with no number pad became imperative. Thus, I figured out how to saw off the number pad (as well as configuring various incarnations of track pads and tiny track-balls incorporated into the keyboard housing in various locations).

When Microsoft released the Natural Keyboard 4000, I upgraded, but again had to saw off the number pad.  Finally, in 2013 they released the Sculpt, and to my joy, it came with the numpad detached!  However, after years of use, the "wireless-ness" of the Sculpt can no longer fulfill my needs.  Thus, the search for a new wired keyboard began.

There is a dirth of one-piece split keyboards with no number pad.  And once you get into two-piece "coding" boards, the price goes up dramatically.

I researched for a couple of months, and the ErgodoxEZ and Dygma Raise ended up as my two finalists.  However, the Dygma uses it's own (though still open-source) Bazecor software for layout and functionality, which even after a couple of years in the real world seems to still have many issues (as reported by regular users), so I was definitely leaning toward the Ergodox, which utilizes a more established and ubiquitous open-source software and has many "compilers" available online for easy access and use.

Over the years social media and template-based web design has turned me off to designing for the web and the coding that used to go along with it (HTML, PHP, Java, etc.), but I still use a keyboard for 8 to 10 hours a day; it's just spread over more activities, the primary being video and music editing.

I began researching split mechanical keyboards just for their ergonomic benefit, but I quickly became very interested in how I could utilize the magic of programming the layout and key functionality to improve my editing workflow.

Now that I had decided which board was going to be best for me, I started watching eBay and Craigslist to find something a little more affordable than the $350 (!!!) the ErgodoxEZ was going to cost new.   The boards on eBay were mostly in auction format and still going for nearly retail.  Craigslist had pretty much nothing listed except a Dygma Raise for pretty much MSRP.  However, after a couple weeks of diligently watching, I got super lucky and found someone "cleaning out old stuff" who was selling an early model ErgodoxEz (no tent legs, no back light) along with a "Let's Split" tiny, mechanical, split keyboard for $100!

I've spent the last couple of weeks familiarizing myself with how everything works, developing my keyboard layout, switching out key caps, loving the "clickity-clack" of mechanical switches, and getting used to using a keyboard that looks and feels nothing like a "regular" keyboard.

For the configuration part, you just create a layout using Ergodox's free online configurator (or one of the many others out there), then click "compile" and download the binary hex file to your computer.  You then use a tiny little executable called "Wally" to flash the hex file to your board.

The fun part is the vast array of functionality with which you can program each key (multiple functions, macros, etc.).  The fact that you can use layers is also great.  Basically, with a keystroke, the entire keyboard can have each and every key reassigned to a new function... and you can have pretty much as many layers as you wish.

I began my journey with the Ergodox by looking for layouts that others had created for video/music editing, and surprisingly, I couldn't find a single one.  I don't know if it was due to sub-par searching skills, or the fact that these boards are targeted more at coders and gamers, but I couldn't find anything with "video," "editing," "Premiere," or even "Adobe" in the description.  After a while I finally found a layout with "Avid" in the title, but it appeared to be just the default keyboard layout.

What I quickly learned is that there are so many layouts available online in Ergodox's un-curated database that it would be futile to try and find one that fit my exact needs.  It has taken a few weeks, and I'm still making changes on a daily basis, but it's getting to a point where I am definitely in love with this board and what a customized layout can offer.

One thing I decided early in my keyboard development was that I was going to base the general layout on the "status quo."  I think a lot of people go so far outside the realm of normalcy that when they don't have their personal keyboard with them, they can't use a "normal" board!  I find this dilemma frustrating enough when I'm on someone else's computer, and I just don't have a split keyboard or my trackball or ShuttlePRO, so I didn't want to paint myself into a corner getting used to a keyboard layout that would alter my muscle memory into oblivion.

Thus, the first layer of my layout is based largely on the MS Sculpt that I have been using for the past seven years.  I have tweaked the layout a bit to maximize functionality with Adobe Premiere, but it's largely just a "normal" keyboard layout.  However, a lot of the "extra" keys are programmed with dual functionality or even macros that allow me to execute Premiere functions more quickly.

At first, I was worried I was going to have to program all the "shift" functionality for each key, but evidently that's an Operating System thing, so you don't have to program for that.  Any key in combination with "shift" does what it would normally do on any keyboard: lower case and capital, but also symbols with their pre-assigned secondary functions (i.e. ";" becomes ":" with the shift key).

The second layer I created for media and navigation.  I set one of the first layer keys as a "momentary switch" so that when pressed and held, the rest of the keyboard becomes controls for the media player, navigation arrows, etc.  The second layer also hosts my "mouse keys."  The Ergodox has some cool "mouse" functionality that I haven't played with much yet, but basically they make it possible to control the cursor as you would with a mouse, except with key strokes.  It sounds clunky, but evidently it's pretty effective once you get used to it.

The third layer I created as symbols and numbers, with the layout based on an actual number pad (along with it's specific functionality).

And that's about as far as I've gotten to date  I'm not sure if I'll create a fourth layer loaded up with macros and multi-function Adobe Premiere and After Effects keys, but right now I'm just getting used to and enjoying the improved functionality afforded by the current layout and combination keys.

One final note: my ErgodoxEZ came with blank key caps, which is fine for "hands on" (literally) typing, but when I'm editing video and recording music, my hands are rarely fused to the home row.  Instead they are often handling peripheral controllers or jotting down notes.  Quickly finding keys is difficult with nothing printed on them! Luckily the "mini split" that came along with the Ergodox had printed keycaps.  I switched out all the ones that would work (letters and a few symbols), and then I penciled in the symbols and functions on the rest of the blank keys.  Obviously pencil marks aren't going to last long (not to mention they're hard to see), so I'm looking for a decent solution for printing on key caps.  I have seen a few people online having success with laser etching/engraving and toner, so I may try that at some point, but it would be nice to find a more permanent way to quickly mark key caps with their assigned functions.  That's really my only "gripe" at this point, but everything else is a great improvement upon my previous situation!

If you want to try out the layout I have created (and alter it for your own use), here is the link to Ergodox site:

Thursday, June 4, 2020

Adobe Essential Graphics - Not Ready for Prime Time

With Premiere CC v14, Adobe is forcing us to switch from Titles (now "legacy" titles) to the new "Essential Graphics" system.  In theory, this is a better system for titles and light graphics (you can even incorporate motion), but they released the "feature" WAY before it was ready for public use.

My first gripe is a big one: you cannot "nudge" type areas with the arrow keys.  To move a text field, you have to either physically drag it (not precise), or use the horizontal/vertical transform controls in the Essential Graphics panel (not convenient).

While there are many other issues, the rest of this post will be dedicated to file management for graphics (files) used in "motion graphics templates."

If you place a graphic (a logo, for instance) via the "new layer" drop down choice "From file" in the  Essential Graphics panel, Premiere just drops the file into your project wherever it feels like it.  If you've got twenty or more folders in a project, good luck finding your file (you can use "reveal in project" from the timeline, but wtf?)! So once you add a file via the Essentials Graphics panel, you'll need to manually move said file to a Motion Graphics (or some other) folder to keep things from getting super cluttered.  Additionally, if you create a "Master Graphics Template," Premiere copies the graphic file that you've utilized to a system folder (not just a bin in your project) that Premiere creates called "Motion Graphics Template Media." This new folder on your hard drive will be filled with folders that have been named with randomly generated strings of characters as if Adobe is trying to prevent us from finding OUR OWN graphics files.  Each Graphics Template has it's own folder named by a long random string (i.e. 0df6380f-23b8-467c-9040-8d2e5dc1096e), but then that folder has a subfolder named simply by the SAME NAME as the Graphics Template you created.  WHY IS THE RANDOM STRING FOLDER NECESSARY?! The bigger question is this... why can't Premiere just access the graphic from it's original location (thus preventing the need for TWICE AS MUCH space to store the file)?  If you need to export your template to a new location or another computer, I could see copying the files then to keep them in the template, but create a duplicate right off the bat? Inefficient and confusing to say the least.

Another issue that drives me nuts: there doesn't seem to be an option to "update Motion Graphics Template" if you make a change to it in your timeline.  For instance, if you're using a template and you make a small adjustment to the text, you only have the option to "Export as Motion Graphics Template" at which point you can either save the template again with the same name and then go back into your library, figure out which is the old template, and manually delete the old one, or give the adjusted template a new name (at which point you will STILL need to delete the old template that is now obsolete from your library).

Finally, as referenced in the above issue, if you create two Motion Graphics Templates and place them in the same library, and you name them with the same title, Premiere will not let you know that you've created a title with the exact same name.  In other words, you could create 30 Motion Graphics Templates, all with the same name; then when you need to use the template you created, you have to sift through all the templates with the same name to see which one is the correct one.  Brilliant.

Tuesday, June 2, 2020

Windows 10 Clip Board "bin"

For years Windows users have had to install third-party software to be able to store more than one item on their "clipboard" (where things go when you cut-and-paste [Ctrl]-C or [Ctrl]-X).  But with a recent update to Windows 10, Microsoft has finally implemented a multi-item clipboard "bin."


The usual cut-and-paste shortcuts still work as they always have, but now you have the option to [Win]-V (windows key + v) and a pop-up will present you with a list of all the things you've cut or copied since turning on your machine last.  This means that from one page, you can cut or copy many items and have access to ALL OF THEM when you go to the location you want to paste those things.  No more going back and forth from various tabs or documents to cut and paste.

This is an incredible time saver.

And not only can you access things you've previously cut or copied during your current session, but you can PIN items to the clipboard for permanent access!  This is a major boon to my daily workflow.

Now instead of having to create a document with commonly used bits of text (common correspondence, various signatures, common strings, etc.), I can pin those things to the clipboard and access them straight from Win-V anytime I wish!

That is an even bigger time saver.

When you open your clipboard, each item will have the ubiquitous "triple dot" next to it.  The options from that menu are "delete," "pin," and "clear all."

If you use multiple Windows devices, you can also choose to sync your clipboard so the items are accessible across as many devices as you wish.  Just type "sync clipboard" in your Windows search bar and follow the instructions!

...

Tuesday, July 9, 2019

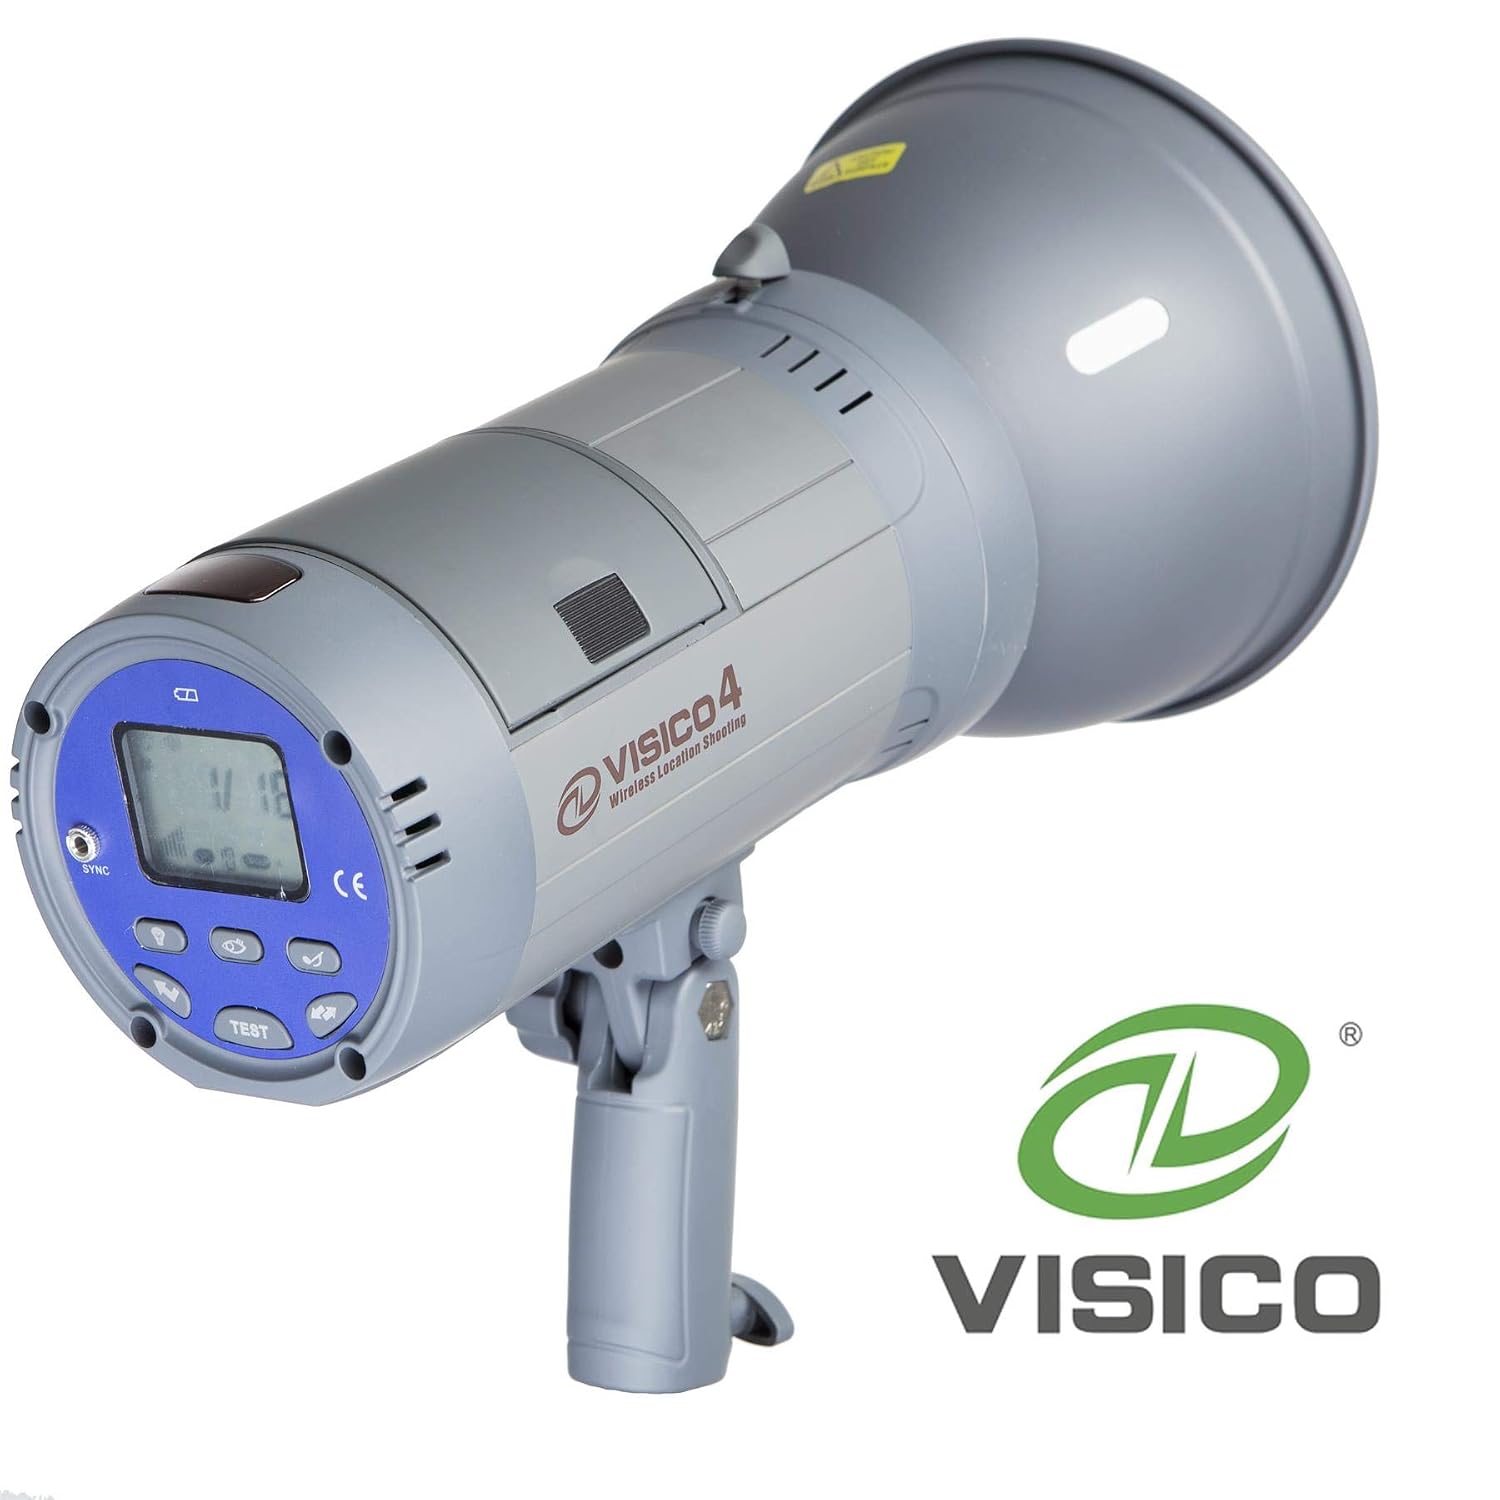
Neewer Vision4 and Visico 4 - SAME FLASH

It's incredible to me how difficult it has been to find a user's manual for the Neewer Vision4 flash.  I finally found some information that clued me in to the fact that Neewer's Vision4 is a rebranded Visico 4, and I could find a manual for the Visico.


https://images-na.ssl-images-amazon.com/images/I/71siVo32X-L._SL1500_.jpghttps://i.ebayimg.com/images/g/69EAAOSwmoVan5ui/s-l1600.jpg

So this post is just to let people know: if you're searching for a Neewer Vision4 manual, search instead for Visico 4 (which is much easier to find).
...

Friday, February 1, 2019

Why Won't My Dough Rise?!

My last two batches of bread haven't risen.  Like, at all.

I finally decided to spend a little time figuring out what's going on, and it turns out, it all comes down to temperature (at least it did for me).

There are quite a few reasons why dough might not rise (dead yeast, other ingredients killing or impeding the yeast's ability to work properly, etc.), but temperature is probably the most common issue.

I knew temperature mattered, but what I didn't realize was just how small the window for error is.

I run hot, so I tend to keep my house pretty cool, especially in the winter (when baking is more fun).  I also consider myself way more of a "cook" than a "baker."  As such, I'm used to winging it, shooting from the hip, improvising, experimenting, and being altogether way more reckless than is acceptable with baking, where apparently you have to stick to the rules a little (or a lot) more.

I've got an insanely delicious Oatmeal Bread recipe from my mom/aunt that reminds me of childhood and all things good in this world.  The recipe says you should put a package of yeast in 3/4 cups of lukewarm water with 1/16 teaspoon of sugar and 1/16 teaspoon of ginger.  There are two problems with this.  1. "Lukewarm" can be quite different from one person to another.  2. Ginger is actually an anti-fungal, and yeast belongs to the fungus family!

I wonder if the pinch of ginger is to keep the dough from going crazy.  A kitchen that is in constant use is warm or even hot, and my mom and aunt's kitchens were certainly that way.  So maybe they needed something to actually keep the yeast in check.  My 64 degree kitchen doesn't need any help.  It will keep yeast from "doing its thing" on its own.

And then there's this idea of  "lukewarm."  In my research, people suggested yeast should proof anywhere from 70 on the low end, to 105 on the high end.  I think the window is even more narrow.  I decided to experiment with temps, by placing yeast and sugar into some water at "room temperature" (my room temperature) and then bringing the temp up slowly to see where the yeast started to get happy.  Sure enough, even though I was starting out with warm water, by the time it hit the (cold) pyrex measuring cup and I added yeast to it, it was sub 70.  I placed my thermometer in the pyrex measuring cup and then placed the measuring cup in a bowl and began to incrementally add water from my instant-hot tap.  I was surprised to see that even around 75 degrees, not much was happening.  80 was better, but it wasn't until around 90 that things really started to happen.  So from now on, I will be sure that my yeast water is at 90 degrees.

The other thing I have to worry about in my cold kitchen is the temperature of the mixing bowl.  I didn't think that would make much of a difference (thinking it would only drop the dough's temperature a tiny bit), but I was wrong.  From now on I will be warming the bowl with hot water and then keeping it in an oven set for proofing.

The final element of fixing my dough-rise problems is actually using the oven to "proof" (placing the kneaded dough in an oven set at a relatively low temperature specifically for rising).  I had been doing this already, but not really paying much attention to getting the oven warm enough or keeping it there.


If you don't have an oven that does well for proofing, there are a couple of tricks you can try.  My oven doesn't really start keeping temperature until it's around 125 degrees, which is a bit too high.  Therefore, I set the oven as low as I can to where it will kick on and off (you can watch the indicator light or listen for the "click"), and then I just keep the door open a bit.  This will cause a greater fluctuation in temperature, so to combat that, I simply placed a couple of my iron skillets on the bottom rack to assist with keeping the temperature constant (the skillets act as heat sinks).  I used my thermometer to monitor things, and I'm able to keep the oven interior at about 100 degrees, which seems perfect to me.


Finally, and especially with the door cracked open, you will want to add an element to keep the rising dough's atmosphere moist.  A lot of people place a damp towel over the bowl, and while that helps a bit, I have started placing a shallow pan of hot water on the bottom rack where the iron skillets are hanging out.  Not only that, but I leave the water there when baking the bread, and I've found it really helps with the consistency and texture of the bread!


So that's it.  If you're having trouble getting your bread to rise, and you know your yeast isn't dead, chances are things aren't warm enough!
...

Saturday, January 19, 2019

PluralEyes Trouble Syncing Continuous Footage (splitting media into mutliple tracks for sync)

I have been working on a project where we shot a week of live performances running anywhere from 4 to 9 cameras with two dedicated audio recorders each night.  Before a program like Red Giant PluralEyes, this would have been a NIGHTMARE to organize and sync.

That said, it's still a bit of a nightmare.

One thing I've run into that I wanted to document for others but also for my own future reference is the difficulty PluralEyes has with syncing audio when the clips are butted up against one another.  In other words, with footage that has been recorded by a camera that records continuously but splits the footage up into multiple clips (we used some Sony AX100's and CX900's as "safety cams"), PluralEyes often freaks out.  As you're sitting there watching the sync, it looks like all is well.  All the clips are turning green and the arrows are lining up, but then at the last second... all the clips spread out and a good number of them turn red.

I've found a work around that isn't too terribly painful.  You just need to find the offending media and break it up into two tracks where you load every other clip.  For instance, all the footage from one of the Sony AX100's is placed into two bins, AX100 01 and AX100 02.  Then I place every other clip starting with the odd numbers in the "01" bin, and then every other clip starting with even numbers in the "02" bin.  This seems to make PluralEyes happier.

At first I was using the "Add takes in new bins (one file per bin)" button, but that becomes a nightmare to organize once you import the files into Premiere (so. many. tracks.).

So now, once I export my XML file from PluralEyes and then import it into Premiere, there are only two tracks for each "problem" camera, instead of a track for every clip from the offending cameras.

Saturday, September 1, 2018

Installing PowerAmp on an Older Android Device That Can't Access Google Play

I use my old HTC Droid Incredible for a media player.  I would TOTALLY still use it for my main phone if it weren't for the fact that it maxes out at 3G and Verizon has stopped allowing older devices to be activated.  I love, love, love it's small size, and I also love the optical joy stick.  PLEASE, oh world's makers of phones, bring small phones and the optical joy stick back!!!

Anyway... I have ripped my hundreds and hundreds of CD's to FLAC.  That means I need a player that will handle FLAC files.  The native Android player on Gingerbread does not support FLAC (or much of anything else).  After a bunch of research, I've landed on PowerAmp as my app of choice.

Now comes the problem.  Google Play no longer supports Android Gingerbread, and my Droid Incredible is running Android 2.3.4.  I just want to play FLAC files with my beloved Droid.

I e-mailed PowerAmp, and they weren't much help.  In fact, here is there reply:
"Google quit supporting Android 2.3 so you may have to find and download older Play version"
Yeah.  Thanks loads for all the help.

So I can't download PowerAmp via Google Play (what is called "Market" on my phone).  I also can't side load the PowerAmp APK to my Droid because Android 2.3.4 doesn't have a file browser, thus if  I drop the APK onto the phone via USB from my computer, there is no way to get to it from inside the phone.  Even if you put it in the "Downloads" folder (to which Android 2.3.4 does allow access), the APK file won't show up because it wasn't put there by Android's Downloads Manager!  Furthermore, I can't download the app from the PowerAmp website, because the only way to access the internet from the phone is via the baked-in "Internet" app on Android 2.3.4.  That app does not support secure web connections (and thus really shouldn't be used to access today's internet, except my hand is currently being forced).

After searching for a work around, a long and convoluted process that I won't bore you with, I figured out a way to get things done.

I used my back up app (MyBackup Pro) on my everyday phone (a Moto Droid Z Force) to create an APK for both PowerAmp and the PowerAmp Unlocker that were on that phone.

I then uploaded those APK's to a non-secure web site --any old website to which you have FTP access and can upload files.  I would advise renaming the APK's so they are easy to type in and then place them as close to the root as you can so you don't have to do a lot of typing. (i.e. YourDomain.com/poweramp.apk and YourDomain.com/unlock.apk)

Thus I was able to download the two APK's via the "Internet" app on my Android 2.3.4 device.  Since they were downloaded in a way Android approved of, I was able to access the APK files via the Downloads app.

When I clicked both APK's, I verified that I wanted to install the apps, and BANG!  I'm running PowerAmp on my Gingerbread device.

Rock and roll (literally).

...

Sunday, August 5, 2018

Using an Old Apple Express to Extend Wifi Range (a/b/n)


It should be noted that the first time I went through the steps below, AirPort Utility told me it wouldn't work with a non-Apple base station.  However, I repeated the steps, and somehow it magically worked [update: no it didn't].  I can [not] confirm that I am using an AirPort Express 802.11n (1st Gen) to extend the network from my Netgear Nighthawk R7000.

It should also be noted that the current firmware for my AirPort Express is 7.6.4 (older firmware) and the newest available version is 7.6.9.  However, I am not updating the firmware just yet in case part of the update included Apple shenanigans to prevent the Express from extending non-Apple networks.

Update: Even after updating the firmware, I can't get the AirPort Express to pass the IP.  The broadcast works and functions as if it is extending the range, but the IP (the internet) does not pass through to the device connecting to the AirPort. So instead, I am just running a long ethernet cable from the main router to the AirPort Express, creating a "new" network with the AirPort, and extending my signal that way.

The steps to set up your AirPort Express as an extender (this information is largely based on a Quora answer given by E.O. Stinson):


Make sure your wireless router is set to a static channel, and write down the router's MAC address.

Configure your AirPort Express using Airport Utility:
    • Under Airport -> Wireless, set the Wireless Mode to "Participate in a WDS Network", and set the network name, security, password, and channel to match your router's settings
    • Now you'll have a new tab: under WDS, set the WDS Mode to "WDS remote" and the "WDS Main" to the MAC address you wrote down for your router. Be sure to tick the box for "Allow wireless clients."
    • Under the Internet tab, set Connection Sharing to "Off (Bridge Mode)."
    • Click Update. Wait for the Airport Express to restart.
    ...


      Tuesday, June 12, 2018

      Adobe Premiere CS6 Will Not Recognize MP4 Files


      Like so many before me, I was having issues with Premiere CS6 suddenly not being able to utilize the MP4 files it had been having no issue with previously (files already imported and utilized in a current project).  I tried to relink media and reimport the files to no avail.

      MP4 is just a container.  Because of this, some would suggest just changing MP4 (the file extension) to M4V or MOV. (extensions sometimes more readily recognized by Premiere).  This can work, but it certainly is not a prefered or stable solution.

      At first I thought it was a Quicktime problem (Quicktime is often annoyingly and persistently attached to the MP4 extension), so I updated Quicktime, but this had no effect.

      Then I realized that all the problem files were shot with a Sony A7R3.  Even though they were MP4 files and not Sony’s proprietary RAW file format, I thought maybe there was something inside the MP4 container that might be Sony-driver-specific, so I updated the Sony drivers as well.  No change in Premiere.

      Finally my internet search turned up another solution entirely… a really lame one.  Simply empty the Premiere CS6 media cache, and *poof* the problem is gone.  Thanks Adobe Forum user Miguel Chavez.  Thanks also, Adobe, for this known and frustrating issue, and for not ever solving it, even before CS6 had been depricated (though the issue is well documented and affected so many users).
      ...

      Wednesday, November 29, 2017

      Bluetooth Problems with MacBook Pro Running Bootcamp (Windows)

      For as long as I've been using my MacBook Pro, my Bluetooth has been abysmal. I run Windows via Bootcamp, but my wife uses her MBP as a Mac and she has the same problems (maybe worse). She got a nice little Jawbone Jambox Bluetooth speaker for Christmas and never even used it, because she couldn't ever get it to connect to her MBP (and for me to get it to work, it took some serious effort, and even then the performance was sub par).

      I have several audio solutions set up around the house and studio, and Bluetooth is a fairly substantial part of the system(s), so today I decided to finally figure out what is going on, once and for all.

      For those who come across this post with the same problem looking for a quick-fix answer, try this:

      1. Go to Device Manager > Network adapters > Broadcom 802.11n Network Adapter
      2. Right click and select Properties.
      3. Click the Advanced tab, go to Bluetooth Collaboration, and select "Enable" from the Value drop-down menu on the right.

      After a lot of research, this seems to be the solution that works for most people.  And while it did help my problem, there are still major problems with my Bluetooth connection.

      What it boils down to?  ANYTHING electronic (yes, I understand the computer is electronic, and that actually IS a factor!) will interfere with the Bluetooth Adapter's signal.  It really is just a matter of the Bluetooth hardware in earlier MacBook Pros being utter and total shite.

      After I completed the steps above to enable Bluetooth Collaboration, I still had issues. I tried rebooting.  I tried altering other settings with both the network adapter and the Bluetooth devices (drivers on the MacBook as well as the devices themselves).  Then I remembered reading previously that a lot of people had problems with actual signal interference.  The MBP power block was sitting on the table (not near enough for me to think it'd be an issue, but still... on the table).  I moved it, and like magic, the music streaming over Bluetooth stopped stuttering.  But as soon as I started using my mouse (connected via wireless), the stutter started again.  So I unplugged the mouse receiver, but that didn't seem to help... and then I actually turned the mouse off via its physical switch, and the signal was smooth again... until I tried looking something else up on the web (using the MBP track pad instead of my mouse), when the stuttering started again.

      So I am now better than where I started.  After enabling "Bluetooth Collaboration" for the network adapter, I can at least walk away from the laptop and stream a smooth music signal to my Bluetooth receiver and stereo.  However, if I touch the computer or put anything electronic anywhere near the MacBook, the signal will be interrupted and stutter like crazy.


      Sunday, June 18, 2017

      Hamilton Beach FlexBrew 49983 E03 Error

      I recently picked up a Hamilton Beach FlexBrew (49983) at the thrift store for $8.  Not bad for a coffee maker that still costs $90 at Kohl’s, Target, Amazon, etc.

      HamiltonBeach49983It worked when I plugged it in at the store, but after a thorough cleaning at home (without submerging!), when I plugged it back in, the display simply read E03.  Sometimes when you get these errors with various electronics, you can plug the machine in while holding down a button or combination of buttons, and the machine will reset itself.  I tried all kinds of combinations, and while I could get the error to change to E08, I couldn’t make it go away.

      I assumed the error was a result of water getting in somewhere it shouldn’t have while cleaning the coffee maker, so I waited several days for the unit to dry out.  After three days, the E03 error persisted.

      There is no information regarding this error (or any error) on the Hamilton Beach website, and from what I can glean from reports from customers who have contacted Hamilton Beach directly, they won’t tell you what any of the error codes mean.  It seems like Hamilton Beach should post a list of error codes so that people (or at least technicians) can diagnose what is wrong.

      Since I couldn’t find any information on the web, I tore the machine apart looking for loose wires or broken solder connections, but I found nothing.

      However, while working on the machine, some strange combination of actions “released” a bunch of water from the spout on the single cup side.  The water had not come out when I simply turned the machine upside down, but when I turned the machine over and over while looking for screws to open it up, I must have turned it in a way that allowed the water to come out.

      So… it would seem the E03 error has something to do with water being trapped in a reservoir or tube somewhere, and that water can’t be drained simply by turning the machine upside down.  Thus, the “fix” is to turn the machine over and over in all directions,  until water comes pouring out of the single serve side spout.

      …

      Monday, February 13, 2017

      Set Default Font in Illustrator and Photoshop CS6

      Under “Window” in the top menu bar, select “Type > Character Styles.”

      A pop-up window will appear.

      CS6-Type-Character-dialog-box

      Double-click “[Normal Character Style]” and another dialog box will appear.

      Select “Basic Character Formats” from the list on the left, and you can define all of your default text properties.

      IllustratorCS6-Type-Character-Basic-Character-Formats

      …

      Wednesday, February 1, 2017

      Five Months Later with The Droid Z Force

      Man, I gotta say, other than size (which I will bitch about vehemently until they bring phones back down to the size of my original Droid Inc.), I am loving this Droid Z Force.

      droid z force JBL tiltExcept for the most extreme high-use periods, I easily get two days on a charge, and when it drops down too low for my liking, it only takes about an hour to get it back to 100%.  The quick charge is amazing, even when using “slower” chargers like my Anker multi-port or my car charger (though these do have higher powered ports than average chargers).

      Not only that, but the speaker mod, though a little bulky, contains a huge battery (and the added bonus of actually pretty decent sounding music on the go!).  I often just leave it on the phone, even if I'm not planning on using the speaker.  It still fits in my pocket nearly the same (obviously quite a bit thicker), and it actually makes the phone a little bit easier to hold onto (though it's not great in the car holder –too thick).  The phone with the speaker attached is kind of like carrying around a comfortably-edged (rounded), small Bluetooth speaker... except with the added bonus of a powerful phone/computer/browser/media player attached! And the kickstand on the speaker, which I use more often than I ever thought I would, is just icing.

      Not only that, but for around $80 (or $30-40 if you want to brave the eBay gray market) there is a Qi (wireless charging) 2220mAh additional battery mod by Tumi/Incipio (which are now one in the same since Tumi licensed Incipio for a year).  You can go for days without charging!

      The Google Pixel seems to be ruling the current mobile roost, but the Droid Z Force is spec'd pretty much the same, and all the apps that will "only" run on the Pixel actually run on the Z Force as well (including all the VR stuff that I have no use for).  And though a lot of people think the Pixel camera is tops, I really think the Droid Z Force phone is great (and, for what’s worth, I make my living taking pictures).

      I feel like I bought at the right time.  Any time you purchase a phone and they start the hard push with advertising four months later (like with my GS5), and then the specs are still as good as all the brand new phones coming out (like with my GS5)... I feel satisfied.

      All this for a phone I got for absolutely free (w/ two year contract) because at the time everyone was going gaga for the Samsung S7.  Doggonit, I feel like a winner.

      Cons:

      • not water proof (at the time I bought my GS5 I thought “water resistant” was a gimmick, but I actulally miss this about my GS5 –which I used to shoot 4K video UNDERWATER for eight hours!!!)
      • no cases, especially with varying sized Moto Mods, so no protection for the phone or additional mods; I installed a matte screen protector (which I prefer to a glossy screen anyway) and the screen is advertised as unbreakable, so there’s that, but the phone and mods are definitely showing some physical wear
      • size, always the size (bring back the original Droid Incredible!)
      • though not a con with the phone, I was extremely disappointed with the “Hasselblad” (apparently in name only) Moto Mod; it’s junk, especially compared to the Droid Z Force’s stellar native camera

      Monday, September 19, 2016

      Hasselblad Moto Mod is a Thorough Disappointment

      I am a photographer.  Thus, I was pretty stoked to know when I purchased my Droid Z Force that there was a Hasselblad Camera Mod coming down the pike.

      I waited patiently for nearly a month, and finally it arrived… and what a major disappointment it was.

      hasselblad-moto-mod

      Here’s the short of it: the Motorola Droid Z Force has a pretty decent camera with a 21MP sensor (some would argue the best camera phone currently available).  The Hasselblad has a 12MP sensor.  Pretty much the ONLY thing going for the Hasselblad Moto Mod is the “optical zoom,” but you can “zoom in” on a 21MP photo and have nearly the same amount of zoom as the 10x optical on the Hasselblad’s 12MP photo!

      The Hasselblad has a 4.5mm to 45mm zoom (that’s why they call it a 10x zoom) which is basically a 25mm to 250mm 35mm equivalent.  The Droid Z Force has a 4.51mm lens, which is equivalent to 26mm on a 35mm camera.  So a 21MP photo can give you nearly the same “zoom” digitally at the Hasselblad’s max resolution of 12MP.  In other words, if you simply crop the Droid’s photo to half (crop a 21MP photo to the Hasselblad max pixel dimension of 12MP), you’re still at 10.5MP and your 35mm equivalent is 52mm (the Hasselblad optical zoom maxes out at 45mm).

      Any positive review I’ve seen for the Hasselblad mod (they are never raving, only lukewarm) goes on and on about the zoom, but frankly… who cares when the zoom really doesn’t do much for you and everything else comes up short?

      Hasselblad Moto Mod shortcomings:

      • Only 12MP sensor (phone has a 21MP sensor) and also physically smaller (1/2.3 inches vs. 1/2.4 inches)
      • minimum aperture of f/3.5 –are you kidding me?! Not only that, but it’s not fixed, and the variable goes all the way up to f/6.5!!!  By the way, the phone’s minimum aperture is f/1.8
      • Max ISO is 3200 (same as the phone)
      • lesser focus technology than phone (the Z Force utilizes laser and contrast auto focus with phase detection; the Hasselblad only utilizes contrast/phase detection)
      • bad 24fps video (choppy)
      • no video HDR (which the phone does have)
      • no optical stabilization for video
      • No 4k (which I don’t care too much about, but if this is an “upgrade” it should at least be able to shoot the equivalent of the phone to which it’s attached!)

      And from what I’ve read in every hands on review I’ve seen, the focus is no faster than the phone (often the user says it’s slower), the shutter lag is much higher than the phone’s, and the quality of the photos isn’t really a bump since the phone already has a decent sensor and utilizes Moto’s “Deep Trench Isolation” technology to isolate pixel color.

      Sure, the Hasselblad Mod can shoot RAW, but who cares, considering all the other shortcomings?

      Please explain to me why I should spend $250-$300 on a “mod” that I have to carry around if it doesn’t IMPROVE the camera on my phone (or even come close to what’s already there!).  Just because it says Hasselblad?  If I’m shooting more than what the very capable Moto Z Force camera is capable of, I think I’ll just carry a REAL camera that actually gives me a reason to mess around with a second device.

      Boo, Hasselblad.  You guys should be ashamed of yourselves for letting Motorola slap your name on a piece of garbage that doesn’t even work as well as the phone to which it attaches.

      …

      Monday, August 29, 2016

      Fixing a Samsung Ice Maker

      One of the most popular posts on this blog is the “How to Defrost a Samsung Ice Maker” post.  In that post I outline how to defrost your Samsung Ice Maker using a “secret code” on your control panel.  You shouldn’t need to do that every week, but a lot of people do, because the Samsung SZAB001TA1 ice maker (which exists in refrigerators like the RF263BEAEW) had serious issues when it left the factory.

      Fortunately, the issues can be remedied.  Unfortunately, Samsung is keeping the information under wraps, and it is extremely difficult to find any information on the subject.  Hopefully this post will help those of you looking for answers.

      So first, here again are the steps for defrosting your Samsung Ice Maker using the control panel on the front of your fridge:

      1. On the front panel display, press the Energy Saver and Refrigerator buttons at the same time for 8 seconds.  The display will switch to the Test Mode and the display will go dark (all buttons, etc., will go dark) .
      2. Press any button within 15 seconds after the display has gone dark to scroll through the Test Modes as follows:
        • Manual operation 1 (FF)
        • Manual operation 2 (0F-r)
        • Manual defrost of fresh food compartments (rd)
        • Manual defrost of fresh food and freezer compartments (fd)
        • Cancel (display goes completely dark)

      “fd” is the one you want.  The defrost mode will cause the refrigerator to beep the entire time it’s in effect (pretty annoying) and will shut off after five minutes (I had to do it quite a few times to thaw everything out).

      When the Geek Squad Tech came to fix our ice maker, he also used a hair dryer to speed things up, but be careful if you go this route as you can actually melt the plastic housing and components and cause greater issues than you had before by deforming the plastic in your ice maker.

      There are four things that need to be changed to make this ice maker work properly.

      1. The water fill tube needs to be adjusted.
      2. The thin gap between the refrigerator wall and the ice maker housing (bottom side of ice maker against fridge wall) needs to be sealed.
      3. The ribs surrounding the ice room fan air duct need to be removed with a utility knife (they cause water to puddle in the duct).
      4. Foam should be installed on to of the ice maker housing around the water fill inlet.
      5. If you have an older control board, the control board should be upgraded.

      These issues are covered in a service bulletin that went out to Samsung Service Techs.  I got to take a look at the four page PDF, but our tech was nervous about getting in trouble if I actually posted the document on the web, so he only let me look at the doc. on his phone.

      Since then, the document has found it’s way to the web.  An anonymous user actually posted the Service Bulletin document number in the comments of my original post on this issue.  So now I have a copy of the PDF here: ASC20150717001 (if you don’t trust the link, just search the doc. title on Google). 

      Looking at the service bulletin is the easiest way to address everything, but I’ll lay things out here as well (though in less detail).

      So, issue #1, the fill tube.  In the back of your Samsung fridge you can see the fill tube sticking out the back of the refrigerator.  This tube has a tendencey to slip, and after that happens water starts pouring all over the ice maker instead of just into the ice tray.  Thus, the first step in fixing your ice maker is making sure this tube goes where it’s supposed to, and then making sure it stays put.  Oddly enough, the tube often slips to far in (not out) and causes water to splash all over the place, so usually you have to actually back the tube out a bit and then secure it.

      Issue #2.  This is an easy fix.  Simply take a tube of silicone and seal the gap.  It seems hard to believe this would be an issue, but I guess it’s why Samsung didn’t catch the problem earlier, and it really makes a difference.

      Issue #3. (see service bulletin)

      Issue #4.  With the entire ice maker out of the refrigerator, cut a thin strip of foam and glue it (silicone works well) around the perimeter of the water inlet area.  See photo below.

      20160409_121521

      Issue #4.  When I got fed up with Samsung “tech” (really just a bunch of people who have NO IDEA what they’re talking about reading scripts on the phone) and went to Best Buy and they put me on the phone with a Geek Squad guy in Minnesota who REALLY knew what he was doing, he listened to what I had to say, realized I had done some research and figure out what was going on, and thus just ordered every possible part that might need to be replaced to fix the issue and had them all sent directly to my house so the parts would already be there when the tech arrived.  Freaking fantastic.  One of the things that got sent was a new controller board.  The board has a lot more ports and resistors and what not.  I took a photo of the new board, but I’m having a hard time locating it.  Here is a photo of the OLD board.

      IMG_20160829_091844

      For what it’s worth, Samsung “customer support” is not support at all.  I spent hours and hours going through the same process over and over again (the person on the other end insisting on reading their script and asking me irrelevant, inane questions ad nauseum).  Each time, they would tell me someone would call me back soon, and each time, after a couple of days I would call back and there would be no evidence that I had ever called and the number I had been given was linked to no information whatsoever.  It was pretty infuriating.  I had to laugh when weeks after the matter was resolved (via Geek Squad, NOT Samsung) I received a letter from Samsung asking if I would like to purchase extended warranty services from them.  Unbelievable.

      Some additional photos of the ice maker problems and fixes…

      20160409_11185120160409_11190620160409_11192120160409_121134

      Tuesday, August 9, 2016

      My First Couple of Days with the Motorola Z Force Droid

      I REALLY wanted to buy a small phone for my next phone, but the Fates conspired against me.  The only option I had was the iPhone SE, and while I LOVE the size and design of the phone (I really love the hard edge and metal buttons and switch), I know I can’t live in an iOS world.  I would go mad.

      The only other option on the market is the Sony Z5 compact, which I REALLY wish I could use, but it’s a GSM only phone, and I live in Denver and regularly travel into the mountains, so Verizon (CDMA) is really the only carrier I can use if I expect to have signal when I want it.

      Thus, for my next phone I went with one of the LARGEST phones on the market. [frown]

      motozForcestyleshell

      I ended up purchasing the Droid Z Force, mostly because it was $108 (with two year contract and including tax) out the door at Best Buy (and they threw in the JBL speaker mod to boot).  With Verizon, there is a $40 activation fee that appears on your bill when you purchase a new phone… even at the Verizon store!  Evidently the only way to get that fee waived is to purchase and activate online with Verizon, which would have been a lot more expensive (full MSRP and no bonus mods).

      Man... when any store tries to convince you that the monthly payment plan is the way to go, CHECK... THEIR... MATH!  Even with the "monthly line discount" they try and bait you with, if you do the monthly payment, you are paying full price for the device over 24 months.  That means you also pay the tax on the MSRP up front!  That alone was going to be $62, then the activation fee, then the full cost of the phone over time (meaning a higher bill every month).  Crazy business.

      The Samsung Galaxy S7 was going to be $220 (with 2 year contract) plus activation, so I just went with what was saving me money, not to mention avoiding the awful one-two punch of the way Samsung and Verizon turn a great phone into a piece of crap with their bloatware (and I have been quite pleased with the "clean" environment of the Moto-verse).

      As I mentioned, BestBuy was also giving away the JBL speaker mod with the Droid Z Force, and while it's not going to be loud enough for DJ-ing parties and weddings, it's actually a pretty decent little speaker and will be great for working on location and listening to tunes.  It has it's own battery as well, so that's great (I have read that the speaker battery can actually power the phone, so it's like a battery mod as well, but I haven't confirmed that yet –I have confirmed that you can charge the mod through the phone though).

      While I definitely hate how big the Droid Z Force is (bigger than my S5 and probably the same size of the Note 5), I have to admit I'm loving the functionality and speed.  The Motorola fingerprint reader is stellar, and I love how you can use it to lock and unlock the phone one handed.  You can also choose to link it to other passwords and apps, which is nice (though I won't be linking it to my banking and purchasing apps).  They warn you that it's not as secure as a pin or pattern, but I assume that's because you can "lift" a print from the reader, so I'm trying to get into the habit of swiping my finger down after it registers, effectively wiping the reader clean of my physical print.

      When I powered up the phone to activate it in the store, the battery was at 99%.  We were on our way into the mountains for a wedding, and the device ONLY comes with the turbo charger (no stand-alone USB-C cord to use with a car charger --you have to order that on your own, which is pretty of annoying since you don't have a good way to transfer files to/from a computer until you do that), so I had no way to charge the new phone except for plugging into a wall.  Even with doing all the initial syncing, playing with the phone and figuring out features, downloading all my apps, etc. (all over 3G and 4G/LTE because I had no wifi), the phone was still at 33% the next day's afternoon!  Way more than 24 hours on the factory charge with a substantially higher amount of use is pretty impressive.

      Not only that, but I went from 25% to 100% in less than a half hour charge using the included turbo charger.

      I have been using Qi wireless charging with my S5, and I actually love it, so I'm pretty disappointed that the Droid Z Force doesn't have wireless charging, especially since pretty much EVERY other "flagship" has it these days.  I guess the turbo charge will have to make up for it.  There is an external battery pack mod that will do wireless charging, but I’m not going to buy an extra mod just for wireless charging.

      I do wish the phone was water resistant like my S5 and the S7, and I'm not sure why it isn't.  The Z Force only has three physical buttons, the card slot, and a USB-C port.  It seems like it would have been relatively easy to seal up.  They advertise that it has a water resistant outer covering, but isn’t all plastic and glass water resistant?  I’m not sure what that even means.

      The camera is great so far.  There's a "pro" mode that allows me to set ISO (though not aperture and shutter speed), so I'm loving that.  Maybe there's an app that will allow me to access those extra manual features.  Also... the camera is 21MP, so I can actually do some zooming and still have "flagship size" (8-12MP) and quality on the zoomed image.

      Hasselblad is coming out with a camera mod for the phone (there was actually a physical spot for it on the Z Force displace at Best Buy, so it must be coming soon).  I'm interested to see what the price will be and how much higher the quality is (it will supposedly do RAW and will have a 10x optical zoom).  It seems weird to have to get a "better" camera mod for a phone that already has a 21MP camera, but we'll see.  Also, I'm not sure what the advantage would be to having a "mod" instead of a stand alone camera that will likely be the same size, but again, I guess I'll see.

      I've read that though the screen is "shatterproof," that feature comes at the cost of being pretty scratch prone (the surface layer that keeps it together is soft), so I ordered a couple screen protectors.  I prefer a matte finish on my screen anyway (no glare and a more pleasing tactile feel).

      I'm also trying to figure out which case to get.  I can't imagine not using a case on a phone to protect from scratches and dents, but the PITA about the "mods" on these phones is they won't attach if the phone is sporting a case.  Thus, I need to find a case that is easy to take on and off, and that can weather the abuse of constantly taking it on and off, so I'm able to attach mods when I want.  To me, this is the biggest draw back of the phone (other than it’s size).

      There is also a "style shell" that is just a faux wood back.  I guess it looks pretty cool, but it really just adds thickness (almost doubles the thickness of the phone), so I'm not sure what the point is, other than looks (which don't matter if you're using a case).  If the "mod" doesn't really offer any protection, it's seems kind of stupid compared to a case that would protect the back, edges, and front (with a raised lip).

      Again, I HATE the size of this thing.  It would be awesome if it were the size of my original Droid Incredible. But everything else about the phone seems pretty great so far.  And I really can't get over how much I'm loving the finger print reader to turn the phone on and off "securely."  Not having to enter a pattern all the time is really nice.  It's actually got me locking the phone every time I turn the screen off, vs. setting a longer time out to lock the phone for reasons of convenience (and making the phone less secure).

      …